For the last five years, I have been working for GoPro, specialising in motorsport film production, writes Sam Werkmeister. In this article I am going to help you get the most out of your camera.
GoPros are the best cameras to use for video, photo and time lapses due to its many features. You can place the camera anywhere on the vehicle, inside or out, knowing that all GoPro mounts will hold your camera securely, to wherever you choose to position it.
I have attached a GoPro to cars and motorbikes which have then travelled in excess of 100mph and I have never had a camera fall off. GoPro produces a range of mounts, to suit all situations. It is purely up to your imagination and creativity to push the boundaries of this amazing camera.
What GoPro settings should I use?
The GoPro 9 camera offers the user a wide range of settings. For all video, I use either 4k 25fps or 2.7k 50fps, and I will shoot in 4:3 aspect ratio.
Why 4:3? The GoPro’s sensor is actually a 4:3 sensor and when you use the full resolution of the sensor, you get no cropping. It means you get more top and bottom in the shot.
One of the advantages of shooting in one of the high-resolution settings is that you can then zoom in or crop your film during editing. This means you can edit to a 16:9 aspect ratio with losing too much quality.
However, most social media platforms allow you to publish your content in 4:3, so pretty much the only time I use 16:9 these days is when I’m publishing on YouTube.
Even for non-action shots, shooting in 4k gives me a lot of options for cropping or using a large canvas.
Which GoPro setting is best for slow-motion?
When I really want to push for some epic slow-motion shots, I use 1440 120fps. This enables you to capture amazing slow motion at an amazing resolution. I always switch on Hyper Smooth, the setting which makes all of your footage super smooth. If the activity needs more stabilisation, simply add the boost on the touch screen. The boost will crop into the image slightly, but it will smooth out any bumps and wobbles.
What are the best GoPro settings for action/point-of-view filming?
2.7k 50fps 4:3 Wide Lens
Hypersmooth – on
Bit Rate – high
Shutter – auto
EV Comp – minus 0.5
White balance – auto
ISO Min – 200
ISO Max – 800
Sharpness – medium
Colour – GoPro
Wind – auto
What are the best GoPro settings for B-roll or handheld filming?
4K 25fps 4:3 Wide Lens
Hypersmooth – on (boost for extra stabilisation)
Bit Rate – high
Shutter – auto
EV Comp – minus 0.5
White balance – auto
ISO Min – 200
ISO Max – 800
Sharpeness- medium
Colour – GoPro
Wind – auto
What are the best GoPro settings for slow motion filming?
1440 120fps Wide Lens
Hypersmooth – on
Bit Rate – high
Shutter – auto
EV Comp – minus 0.5
White Balance – auto
ISO Min – 200
ISO Max – 800
Sharpeness – medium
Colour – GoPro
Wind – auto
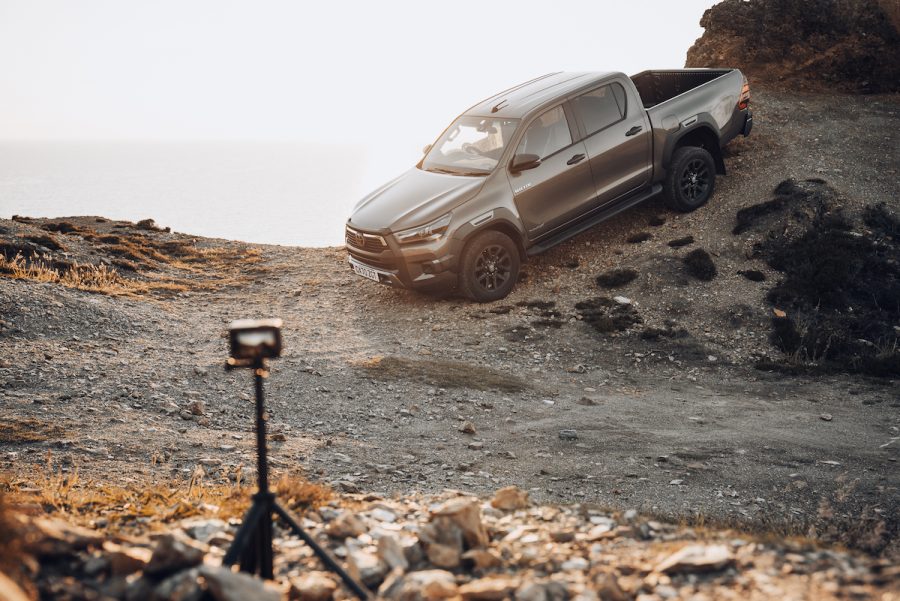
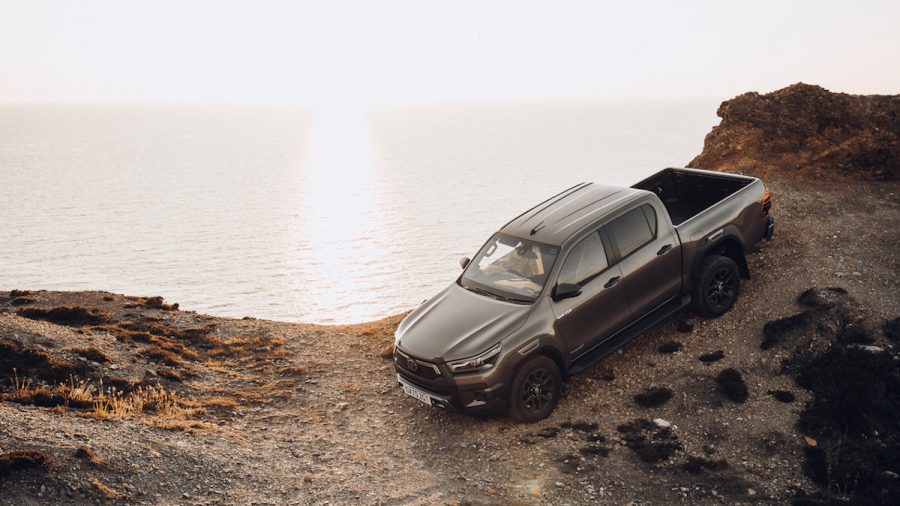
Mounting a GoPro to a vehicle
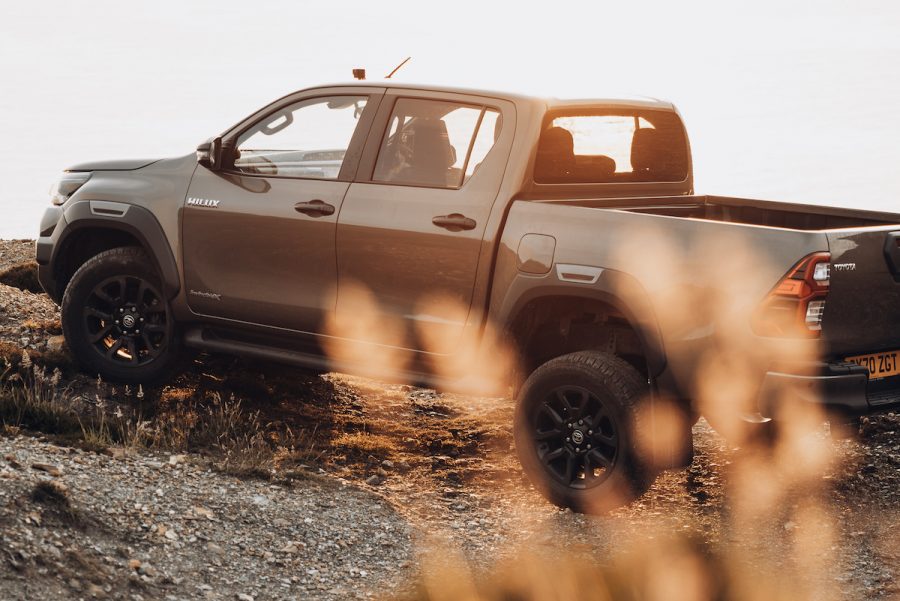
The Hilux is born for action, making it a perfect choice of vehicle to use in conjunction with a GoPro. I will cover how to set-up and mount your camera and film your vehicle.
When I decide where to mount the camera, I like to plan what angles will showcase the best of the vehicle. Bonnet, roof, wheel arches, underneath and wing mirror, all of these angles are my favourites.
I start with the GoPro suction mount which provides a secure seal on the paint work of the Hilux. I firstly hold the GoPro in the area where I want to mount. Doing this gives the assurance that I have the angle correct, plus I do not need to keep attaching and removing the mount to tweak the angle.
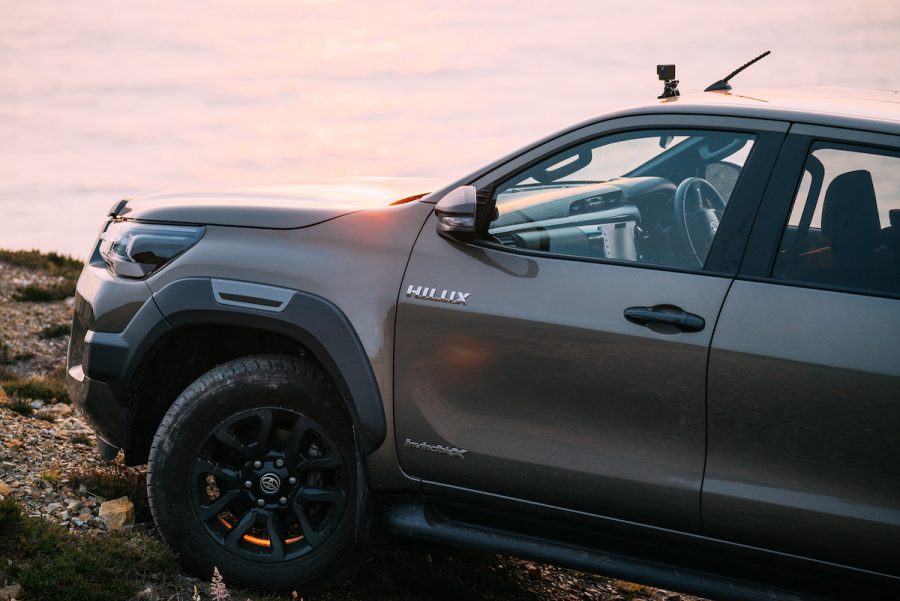
I check my shot, then look at where I can securely attach the mount. All areas of the body with a gloss finish are perfect. The button in the centre of the mount will push all air out of the cup and you will be left with one of the most secure mounts.
The Jaws clip is amazing. The grip is second to none and its low profile works well when fixing the GoPro under the vehicle. You can use the Goose Neck to extend the mount further. When using this set-up in conjunction with the Hyper Smooth setting built into the camera, you will never have a shaky shot.
The final mount is the GoPro 3M Stickie. Whether you use the flat or curved version, these will never fall off. I will use this mount on all surfaces, in all conditions, they are waterproof as well. I use them inside the cab, to capture footage of the driver and the passengers.
One tip: if you are finding it the GoPro 3M Stickie difficult to remove, use the stem of a screwdriver and position diagonally across the mount and twist (without touching the surface of the car). This will push from two corners and the mount should twist off.
Using a GoPro for handheld or static shots
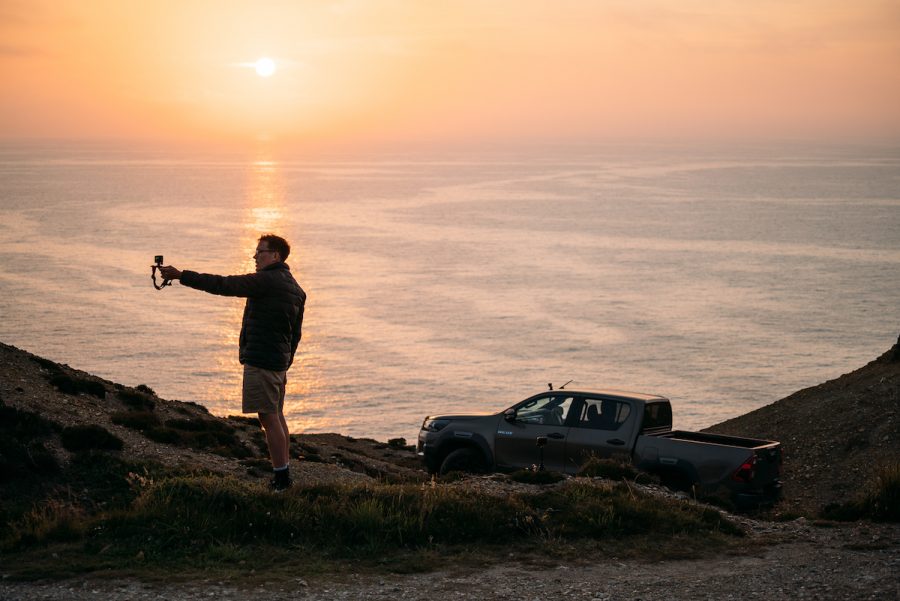
The GoPro is not just an action and point-of-view camera. It is amazing for filming yourself with the car or grabbing a tripod and placing the camera on the floor/wall and capturing yourself driving.
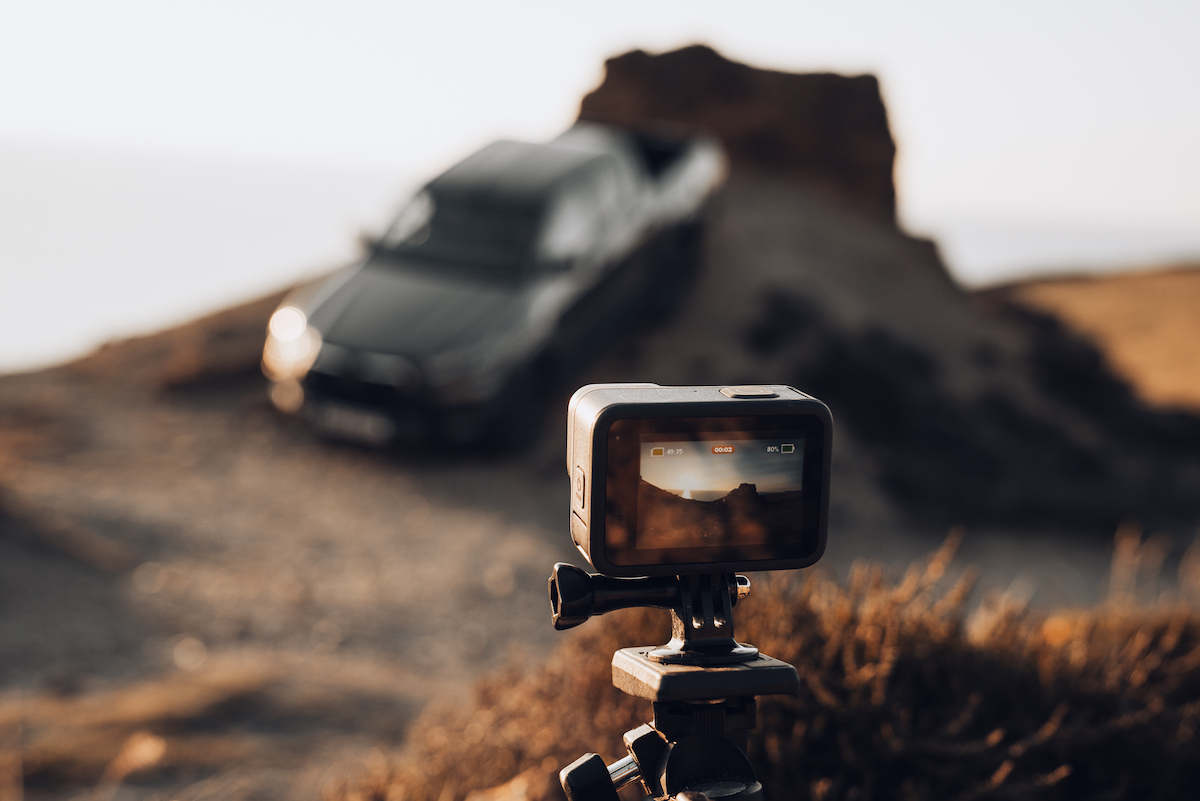
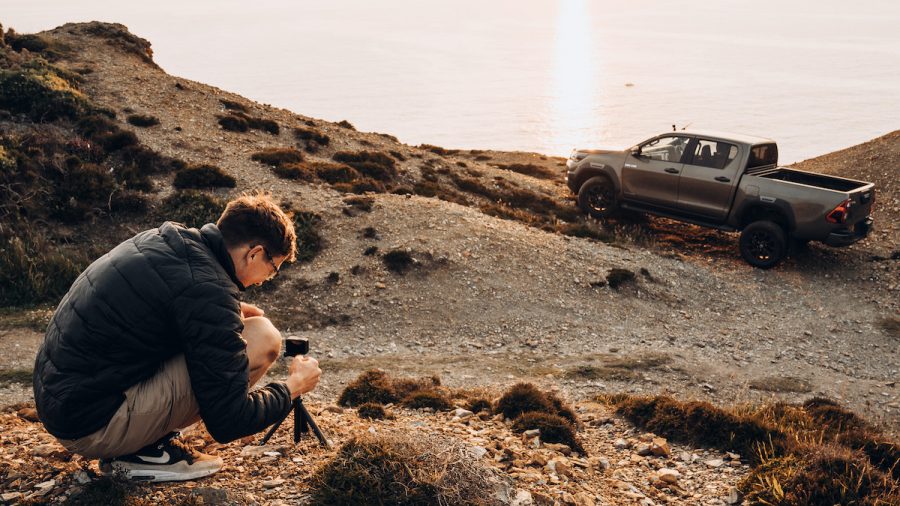
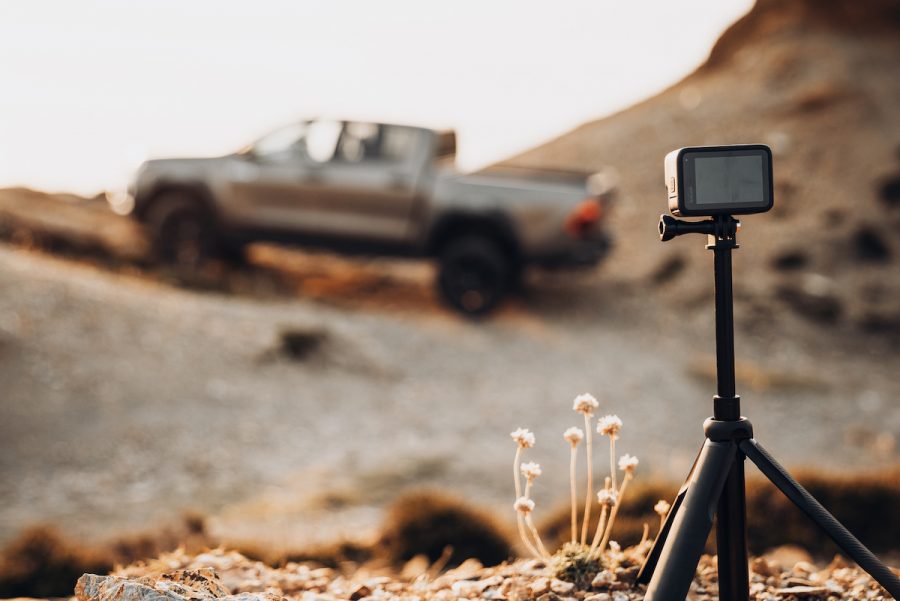
Either place the camera itself on the floor or grab a mount and get the best angle. I carry a mini tripod with my camera at all times. I can throw the camera down and get the epic shot from a new angle, plus you can use a mini tripods as a handler and film myself vlogging.

The new screen on the front of the GoPro enables you to check the shot, without having to look at the back screen. One tip: activate voice control and then you are handsfree, just say “GoPro start recording”.
Using a GoPro for timelapse
When you turn on your GoPro, you will see the video format. Use your finger and swipe from left to right. Here you will find all your time lapse, night lapse and hyper lapse film modes.
For the time lapse, I firstly plan my angle, whether that is on a tripod or tucked away on a rock, this is completely up to you. After I have my angle, I decide what my time interval is. For shots of people moving in an area, I will use 0.5 seconds and if I was shooting a sunset, I would use between 10-30 seconds.
The frames per second is made up of 25 frames, so each shot is 1 of 25, which is 25 of 1 second. It can be very confusing but once you have experimented, you will know exactly what setting you want before you start. Press the red button and you will start recording. I try to turn off any extra options on the camera, like the front screen – this will save battery.
What are the best GoPro settings for timelapse filming?
When you have your location, shot and interval selected, there’s some key settings within the camera. Press the time lapse icon, then the pen icon.
Resolution – 4K
Lens – Wide
Format – Video
Interval – Depends on your situation
Bit Rate – High
EV comp – 0
White balance – Auto
ISO min – 200
ISO max – 800
Sharpeness – medium
Colour – Gopro
This is my main set-up and the majority of the time will suit most situations. One major tip when shooting time lapse is to use an external battery charger. Flip the GoPro battery door and plug your USB cable into the power, then plus the other end into a battery pack/charger.
This will supply the power in place of the GoPro battery and keep the camera powered for hours. It is perfect for any time lapse shooting and will make sure you don’t lose power right when you need it.
Using a GoPro to take photos
The GoPro is not only a tool to film with but also amazing for taking photos. The GoPro 9 will take photos that will rival a DSLR camera, plus you can place a GoPro in positions not many cameras can achieve.
You can use the ‘Burst’ function to grab epic action shots, or a single photo to capture an amazing landscape. I like to use the GoPro SuperPhoto or standard setting. The SuperPhoto option will let the camera decide the best settings and give you the best possible photo.
I also like to use the standard setting and then play with the options in ProTune, giving me more control. You can use the camera in portrait or landscape formats; portrait is the perfect dimension for Instagram Stories.
What are the best GoPro photo settings?
Lens – Wide
Output – Standard
Shutter – Auto
EV Comp – 0
White Balance – Auto
ISO Min – 100
ISO Max – 800
Sharpness – Medium
Colour – GoPro
Take your GoPro out of the box and enjoy. The more you use it, the more you will love it!
NB: This piece was created using highly trained, professional photographers working off-road in strictly controlled conditions and with comprehensive safety equipment. This should not be attempted on public roads at any time.
Words by Sam Werkmeister, Image credit: Laurie McCall

A very helpful piece, thank you
I not you do not mention ND filters , any reason why? and when would you use them with the settings you describe?
I film moving cars and use ND to create motion blur which I assume is natural to the eye? Setting acer typically Shutter speed 1/48 when using 24fps